Let's look what he looks like
We can't wait more and we wont our first render! To do so we still ust do some preliminary work.
SHIFT LMB on the top right tiny button of the layer visibility buttons in the 3D Window toolbar Figure 19 to make both Layer 1 (Gus one) and Layer 10 (camera one) visible.

Remember that the last selected is the active layer, so all subsequent additions here will be automatically to layer 10
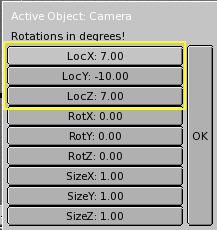
Select the camera (RMB and move it in a location like (x=7,y=-10,z=7). You can do this by pressing GKEY and dragging the camera around keeping CTRL pressed to move it in steps of 1 grid unit.
 | Entering precise locations and rotations |
|---|---|
If you prefear to type in numerical values for an Object location you can do so by pressing NKEY and nodifying the NumButtons of the dialog which appears Figure 20. Remember to press OK to validate your input. |
To make the camera point Gus, with your camera still selected select also Gus via SHIFT RMB. Now the camera will be magenta and Gus light pink. Press CTRL T and select the Make Track entry in the pop up. THis will force the camera to track Gus and always point to him. You could move the camera wherever you want later on and be sure Gus is in the center of the camera view!
| Tracking |
|---|---|
If the tracking object already has a rotation of its own, as it is often the case. The result of the CTRL T sequence might not be what expected. In this case select the tracking object, in this case the camera, and press ALT R to remove any object rotation. Once you do this the camera will truly track Gus! |
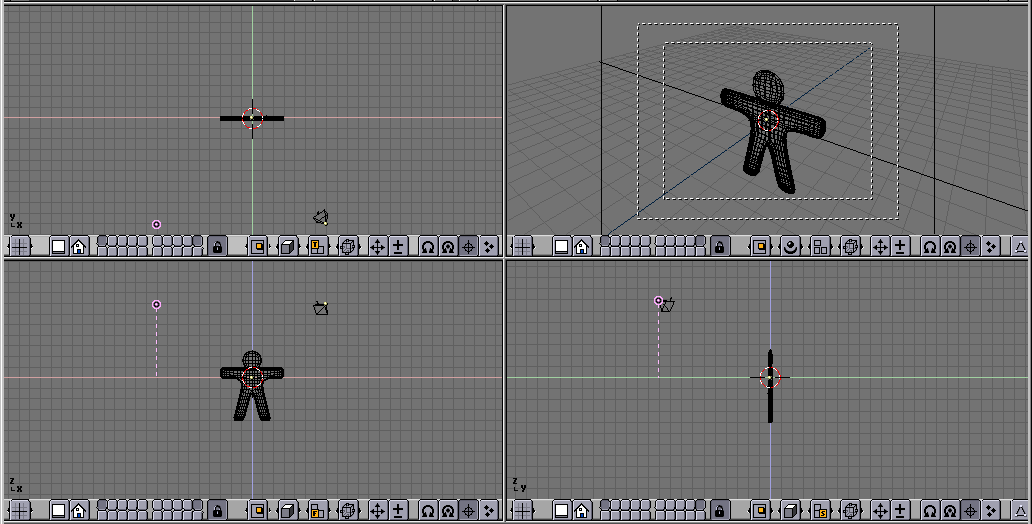
Figure 21 shows Top, front side and camera view of Gus. To obtain camera view press NUM 0.
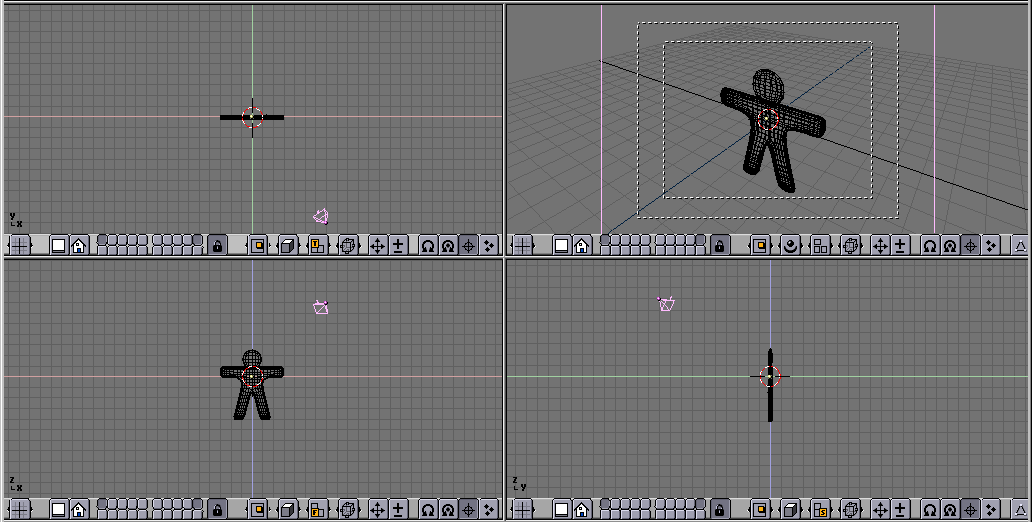
Now we will need a ground on which Gus could stand. In top view (NUM 7), and out of Edit Mode add a plane (SPACE>>ADD>>Mesh>>Plane). It is important to be out of EditMode, otherwise the newly added object would be part of the object currently in EditMode, as it was for Gus head when we added it. If the cursor is where Figure 21 shows, such a plane will be in the middle of Gus head. Switch to ObjectMode and front view and move ( GKEY the plane down at Gus feet, using CTRL to keep it aligned with Gus.
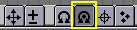
Switch the reference center from cursor (where we set it at the beginning) to object pressing the highlighted button of Figure 22. Go to camera view (NUM0) and, with the plane still selected, press SKEY to start scaling.
Scale the plane up so that it is so big that its edges are outside of the camera viewing area, this is indicated by the outher white dashed rectangle in camera view.
In Top view (NUM 7) add a Lamp light (SPACE>>ADD>>Lamp) in front of Gus but on the other side with respect to the camera, for example in (x=-9,y=-10,z=7) Figure 23
Switch to Lamp Buttons via the button with a lamp in the Button Window toolbar Figure 24 or F4.

In these buttons press the Spot toggle button to make the lamp a Spotlight Figure 25 of pale yellow (R=1,G=1,B=0.9) colour. Adjust ClipSta: Num Button to 5, Samples: to 4 and Soft: to 8.

Make this Spotlight track Gus exactly as you did for the camera (Select Spot, SHIFT select Gus, press CTRL T. If you added the spot in Top View you should need not to clear its rotation via zALT R
In the same location as the Spot, and again in top view, add a second Lamp (SPACE>>ADD>>Lamp). This you shoud make of type Hemi ad of energy 0.6 Figure 26

| Two lamps? |
|---|---|
Having two or more lamps helps a lot in giving soft, realistic lighting. In reality light never comes from a single point. YOu will learn more on this in the lighting Chapter. |
We're almost ready to render. First go to the Render Buttons by pressing the imagine-like icon in the Button Window toolbar Figure 27.

In the Rendering Buttons set the image size to 640x480 with the Num Buttons top right, sets Shadows Toggle Button top center to on , and the OSA Toggle Button center-left to on too Figure 28. These latter will enable shadows and oversampling (OSA) to prevent jagged edges.

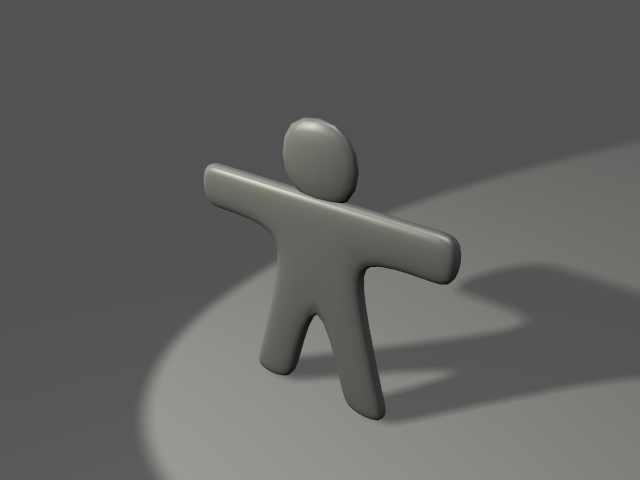
You can now hit the RENDER button or hit F12. The result is in Figure 29... and is actually quite poor. We still need materials! And lots of details, eyes, etc.
| Saving |
|---|---|
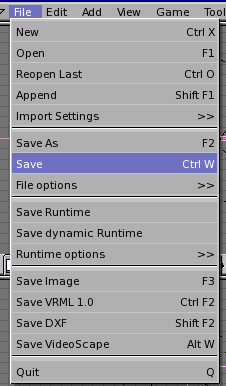
If you have not done it yet, this is a good point to save your work, via the File>>Save menu Figure 30, or CTRL+W Blender will always warn you if you want to save over an existing file. Blender does automatic savings in whichever is the temporary directory of your system. By default this happens every 4 minutes and the file name is a number. This is another way to undo your last changes! |