LampButtons

The settings in these ButtonsWindow visualise the Lamp DataBlock. The LampButtons are only displayed if the active Object is a Lamp. HotKey for LampButtons: F4.

The DataButtons in the Header indicate what Lamp block is visualised.
Users
If the Lamp Block is used by more than one Object, this button shows the total number of Objects. Press the button to make the Lamp "Single User". Then an exact copy is made.
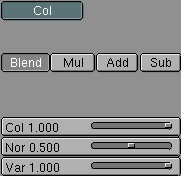
Lamp options
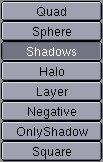
Quad
The distance from the lamp is in inverse quadratic proportion to the intensity of the light. An inverse linear progression is standard (see also the buttons "Dist", "Quad1" and "Quad2").
Sphere
The lamp only sheds light within a spherical area around the lamp. The radius of the sphere is determined by the "Dist" button.
Shadows
The lamp can produce shadows. Shadow calculations are only possible with the Spot lamps. The render option "Shadows" must also be turned ON in the DisplayButtons. See also the shadowbuffer buttons later in this section.
Halo
The lamp has a halo. This only works with Spot lamps. The intensity of the halo is calculated using a conic section. With the option "Halo step:" it also uses the shadow buffer (volumetric rendering). The scope of the spot halo is determined by the value of "Dist".
Layer
Only Objects in the same layer(s) as the Lamp Object are illuminated. This enables you to use selective lighting, to give objects an extra accent or to restrict the effects of the lamp to a particular space. It also allows to you keep rendering times under control.
Lamp types

Spot
The lamp is restricted to a conical space. The 3DWindow shows the form of the spotlight with a broken line. Use the sliders "SpotSi" and "SpotBl" to set the angle and the intensity of the beam.
Sun
The light shines from a constant direction; the distance has no effect. The position of the Lamp Object is thus unimportant, except for the rotation.
Hemi
Like "Sun", but now light is shed in the form of half a sphere, a hemisphere. This method is also called directionalambient. It can be used to suggest cloudy daylight.

Dist
For the lamp types "Lamp" and "Spot", the distance affects the intensity of the light. The standard formula is used for this:
D = "Dist" button, a = distance to the lamp. Light intensity = D/(D + a).
This is an inverse linear progression. With the option "Quad", this becomes:
Light intensity = D/(D + a*a).
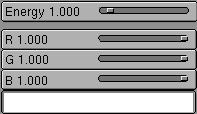
Energy
The intensity of the light. The standard settings in Blender assume that a minimum of two lamps are used.
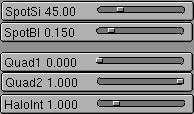
SpotSi
The angle of the beam measured in degrees. Use for shadow lamp beams of less than 160 degrees.
Quad1, Quad2
The light intensity formula of a Quad Lamp is actually: Light intensity = D / (D + (quad1 * a) + (quad2 * a * a)) D = "Dist" button. a = distance to the lamp. The values of "quad1" and "quad2" at 1.0 produces the strongest quadratic progression. The values of "quad1" and "quad2" at 0.0 creates a special Quad lamp that is insensitive to distance.
Shadow Buffer

Blender uses a shadowbuffer algorithm. From the spotlight, a picture is rendered for which the distance from the spotlight is saved for each pixel. The shadow buffers are compressed, a buffer of 1024x1024 pixels requires, on average, only 1.5 Mb of memory.
This method works quite quickly, but must be adjusted carefully. There are two possible side effects:
Aliasing . The shadow edge has a block-like progression. Make the spot beam smaller, enlarge the buffer or increase the number of samples in the buffer.
Biasing . Faces that are in full light show banding with a block-like pattern. Set the "Bias" as high as possible and reduce the distance between "ClipSta" and "ClipEnd".
Bufsi 512, 768, 1024, 1536, 2560 (RowBut)
The size of the buffer in pixels. The value of DisplayButtons->Percentage (100%, 75%, ...) is multiplied by this.
ClipSta, ClipEnd
Seen from the spot lamp: everything closer than ClipSta always has light; everything farther away than ClipEnd always has shadow. Within these limits, shadows are calculated. The smaller the shadow area, the clearer the distinction the lamp buffer can make between small distances, and the fewer side effects you will have. It is particularly important to set the value of ClipSta as high as possible.
Samples
The shadow buffer is 'sampled'; within a square area a test is made for shadow 3*3, 4*4 or 5*5 times. This reduces aliasing.
Halo step
A value other than zero in the button "Halo step" causes the use of the shadow detection (volumetric rendering) for Halos. Low values cause better results and longer rendering times. A value of "8" works fine in most cases.

Texture name
A Lamp has six channels with which Textures can be linked. Each channel has its own mapping, i.e. the manner in which the texture works on the lamp. The settings are in the buttons described below.
Mapping: coordinates input.

Each Texture has a 3D coordinate (the texture coordinate) as input. The starting point is always the global coordinate of the 3D point that is seen in the pixel to be rendered. A lamp has three options for this.
Object Name
The name of the Object that is used for the texture coordinates. If the Object does not exist, the button remains empty.
Object
Each Object in Blender can be used as a source for texture coordinates. To do this, an inverse transformation is applied to the global coordinate, which gives the local Object coordinate. In this way, the texture is linked with the position, size and rotation of the Object.
View
The view vector of the lamp; the vector of the global coordinate to the lamp, is passed on to the texture. If the lamp is a Spot, the view vector is normalised to the dimension of the spot beam, allowing use of a Spot to project a 'slide'.

Users
If the Texture Block has multiple users, this button shows the total number of users. Press the button to make the Texture "Single User". Then an exact copy is made.
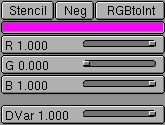
Stencil
Normally, textures are executed one after the other and placed over each other. A second Texture channel can completely replace the first. This option sets the mapping to stencil mode. No subsequent Texture can have an effect on the area the current Texture affects.