Extrude
A tool of paramount importance for working with Meshes is the "Extrude" command (EKEY). This command allows you to create cubes from rectangles and cylinders from circles. Extrude allows you create things such as tree limbs very easily. Although the process is quite intuitive, the principle behind Extrude is outlined below:
First, the algorithm determines the outside edge-loop of the Extrude, i.e. which among the selected edges will be changed into faces. By default, the algorithm considers edges belonging to two or more selected faces as internal, and hence not part of the loop.
The edges in the edge-loop are then changed into faces.
If the edges in the edge-loop belong to only one face in the complete mesh, then all of the selected faces are duplicated and linked to the newly created faces, e.g. rectangles result in cubes during this stage.
In other cases, the selected faces are linked to the newly created faces but not duplicated. This prevents undesired faces from being retained 'inside' the resulting mesh. This distinction is extremely important since it ensures the construction of consistently coherent, closed volumes at all times when using Extrude.
Edges not belonging to selected faces, hence forming an 'open' edge-loop are simply duplicated and a new face is created between the new edge and the original one.
Single selected vertices, not belonging to selected edges are duplicated and a new edge created between the two.
Grab mode is automatically started when the Extrude algorithm terminates, so newly created faces/edges/vertices can be moved around with the mouse.
Extrude is one of the most frequently used modelling tools in Blender. It's simple, straightforward and easy to use, yet very powerful. The following short lesson describes how to build a sword using Extrude.
The Blade
Start Blender and delete the default plane. In top view add a mesh circle with 8 vertices. Move the vertices so they match the configuration shown in Figure 19.
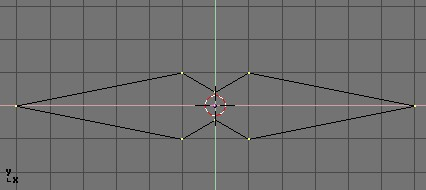
Select all the vertices and scale them down with the SKEY so the shape fits in 2 grid units. Switch to front view with NUM 1.
The shape we've created is the base of the blade. Using Extrude we'll create the blade in a few simple steps. With all vertices selected press EKEY, or click the button labelled extrude in the EditButtons (F9 - Figure 20). A box will pop up asking Ok? Extrude (Figure 21).


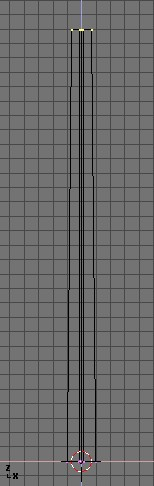
Click it or press ENTER to confirm, move the mouse outside or press ESC to exit. If you move the mouse now you'll see the following has happened: Blender has duplicated the vertices, connected them to the original ones with edges and faces, and has entered grab mode. Move the new vertices up 30 units, constraining the movement with CTRL. Click the left mousebutton to confirm their new position and scale them down a little bit with the SKEY (Figure 22).
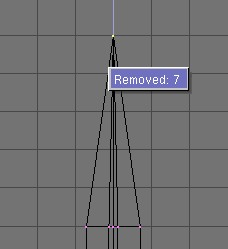
Press EKEY again to extrude the tip of the blade. Move the vertices five units up. To make the blade end in one vertex, scale the top vertices down to 0.000 (hold CTRL for this) and press WKEY>Remove Doubles (Figure 23) or click the Rem Doubles button in the EditButtons (F9). Blender will inform you it removed seven of the eight vertices and only one vertex remains: the blade is done! (Figure 24)

The Handle
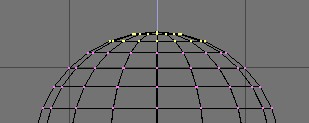
Leave edit mode and move the blade to the side. Add a UVsphere with 16 segments and rings and deselect all the vertices with the AKEY. Borderselect the top three rings of vertices with BKEY and delete them with XKEY>Vertices (Figure 25).
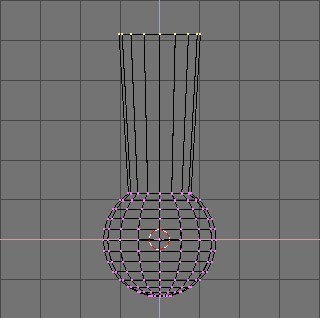
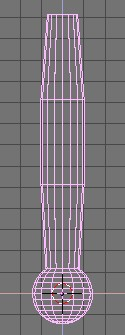
Select the top ring of vertices and extrude them. Move the ring up four units and scale them up a bit (Figure 26), extrude and move 4 units again twice and scale the last ring down a bit (Figure 27). Leave EditMode and scale the entire handle down so it's in proportion with the blade. Place it just under the blade.
The Hilt
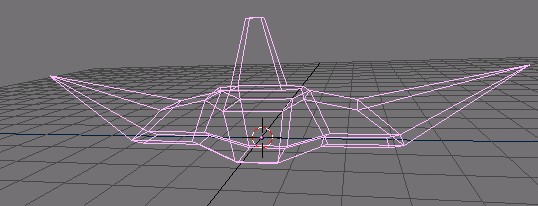
By now you should be used to the 'extrude>move>scale' sequence, so try to model a nice hilt with extrude. Start out with a cube and extrude different sides a few times, scaling them where needed. You should be able to get something like that shown in Figure 28.
After texturing, the sword looks like Figure 29
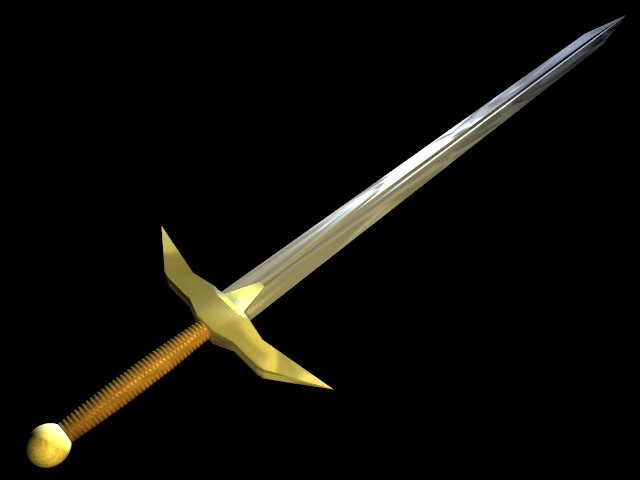
As you can see, extrude is a very powerful tool allowing you to model relatively complex objects very quickly (the entire sword was created in less than a half hour!). Getting the hang of extrude>move>scale will make your life as a Blender modeller a lot easier.