Screw
The "Screw" tool starts a repetitive "Spin" combined with a translation generating a screw-like, or spiral-shaped, object. You can use this to create screws, springs or shell-shaped structures.
The method for using the "Screw" function is strict:
Set the 3DWindow to front view (NUM1).
Place the 3DCursor at the position through which the rotation axis must pass. Such an axis will be vertical.
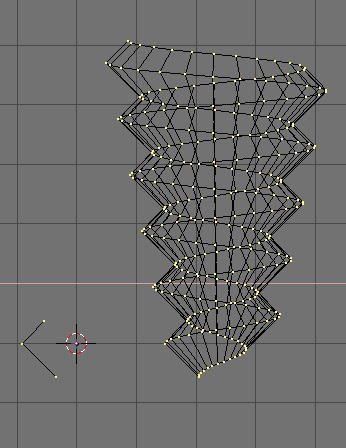
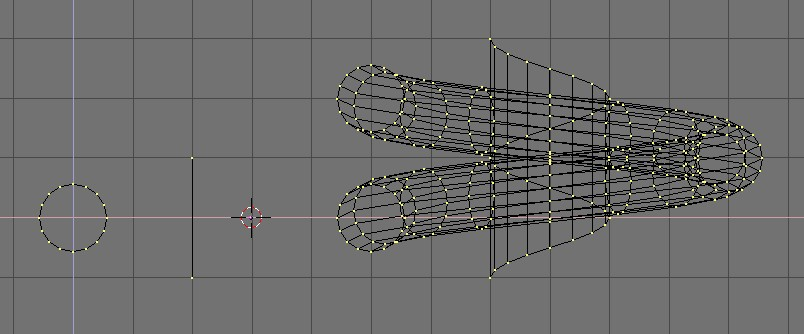
Ensure that an open poly line is available. This can be a single edge as in the figure or half a circle, or ensure that there are two 'free' ends; two edges with only one vertex linked to another edge. The "Screw" function localises these two points and uses them to calculate the translation vector that is added to the "Spin" per full rotation (Figure 45). If these two vertices are at the same location, this creates a normal "Spin". Otherwise, interesting things happen!
Select all vertices to participate in the "Screw".
Give the Num Buttons Steps: and Turns: the desired values. Steps: is related to how many times the profile is repeated within each 360° rotation, while Turns: is the number of complete 360° rotations to be performed.
Press Screw!
If there are multiple 3DWindows, the mouse cursor changes to a question mark. Click on the 3DWindow in which the "Screw" is to be executed.
If the two "free" ends are aligned vertically the result is the one seen above. If they are not, then the translation vector stays vertical, equal to the vertical component of the vector joining the two 'free' vertices, while the horizontal component generates an enlargement (or reduction) of the screw as shown in Figure 46.