Creating content for the plug-ins
When creating content for the plug-in, there is not much difference with creating and running content inside Blender or as a stand-alone game. There is one difference however. The plug-in might have dimensions that do not correspond to the settings made in the Blender file. This might create a difference in aspect ratios. The plug-in will match the two as good as possible.
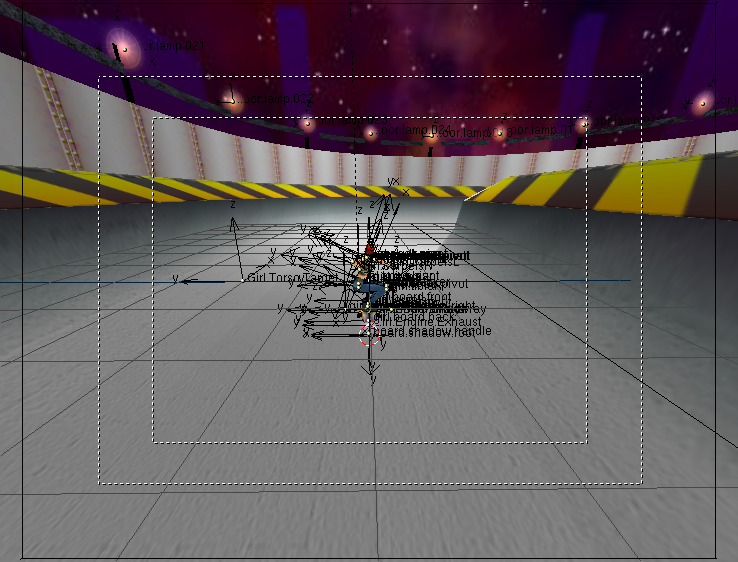
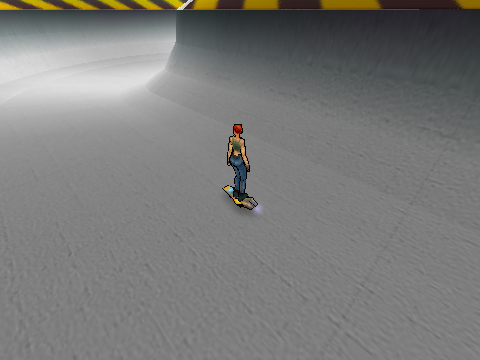
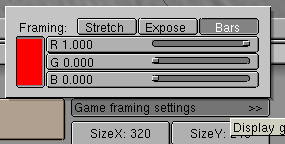
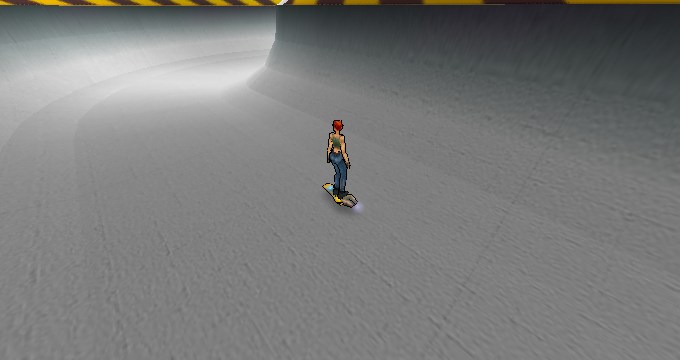
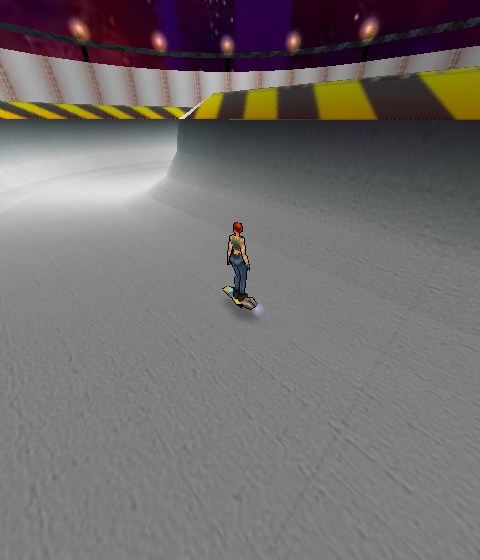
The next figures show the situation of a perfect match. In the 3D view of Figure 2, the outer dotted rectangle shows the area that is to be displayed. The size and shape of this rectangle is set by changing the value in the SizeX and SizeY buttons in the DisplayButtons (F10) of Blender. The size of the plug-in in Figure 3 has been set to the same values.
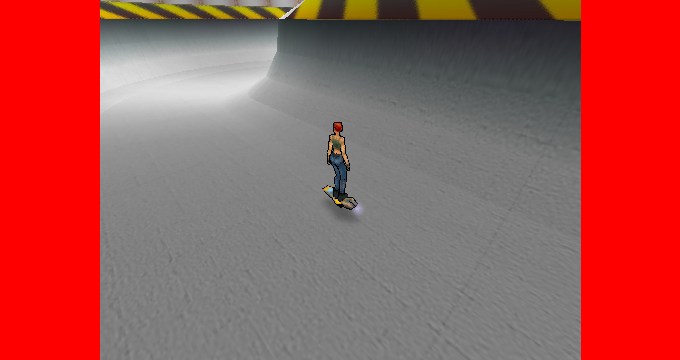
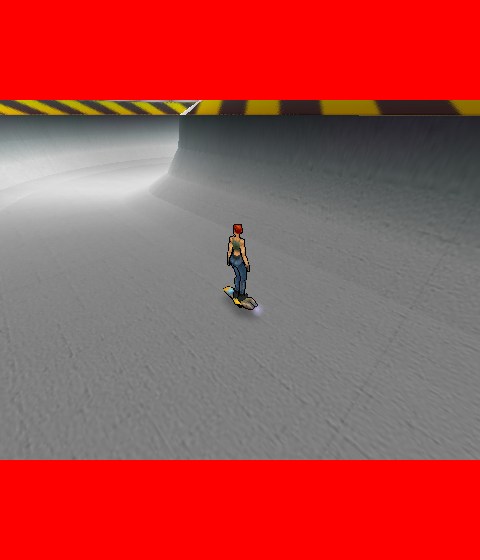
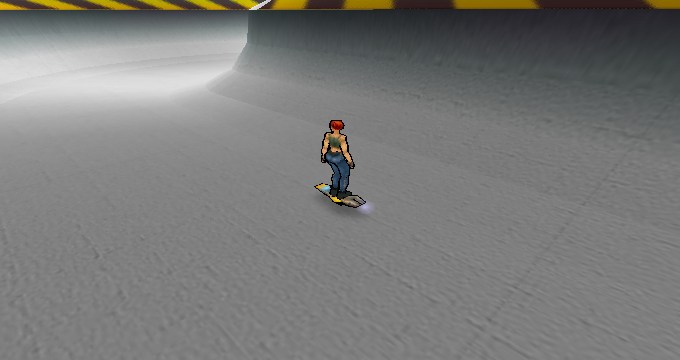
In the images in Figure 4, the aspect ratio of the plug-in does not match the Blender file. You'll notice that the plug-in or stand-alone player will try to show the content as big as possible without distortion of the content. The extra areas within the plug-in are drawn in a solid color (red in the figures) that can be either set in the HTML or in the Blender user interface.
How the plug-in or stand-alone player solves the difference in aspect ratio can be controlled in Blender. In the Display Buttons (F10) click on the "Game framing settings" button. You now can select three options: Stretch, Expose or Bars. If you select Bars the extra areas are filled with the color you set with the color sliders.
You can have different settings for different scenes. So you can have a 3D scene with bars and an overlay scene that is stretcht to fit to the output size.
If you select for a single 3D scene the settings as they are shown in Figure 5 you'll get results similar to the pictures in Figure 4.
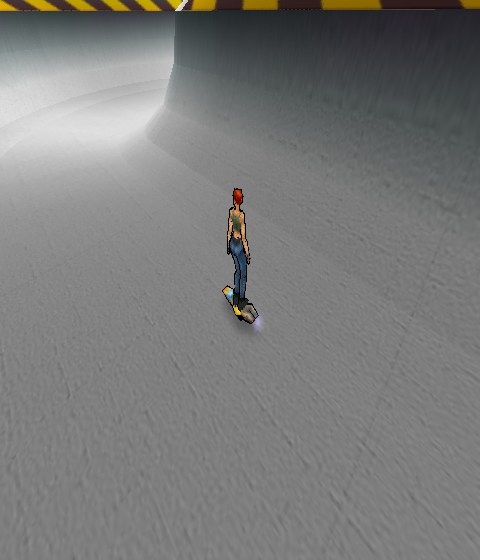
If you select "Expose", the plug-in or stand alone player will simply show more of the 3D environment. This will usually produce the most natural results but if you have enemies coming from the top or from the sides the user might see them pop up.
And finally, if you select "Stretch", the plug-in or stand-alone player will simply stretch the image horizontally or vertically to fit. This will distort the image somewhat (See Figure 7) but you'll never see bars or more from the 3D world as defined in Blender.
Jumping to another HTML page
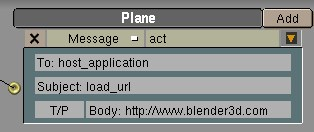
It is possible to have the browser load a new URL from within your Blender file. Send a message with the "To:" field set to "host_application" and the "Subject:" "load_url". The message's "Body:" should contain the full URL you want the browser to load.
Creating a custom loading animation
The file load.blend (download at http://www.blender3d.com/plugin/blend/load.blend) is an example of a custom loading animation for the Blender 3D Web Plug-in. The selected object has all of the important logic for showing file loading progress. It has a property called "progress". The value of that property drives the Ipo animation curve of the object, causing its size to increase in the Z direction. This is the most convenient way to use the loading information, because it's easy to set up and preview an Ipo animation.
The only tricky part is to get the file loading progress information being sent by the plug-in. The plug-in sends game messages with the subject "progress" as the file loads. Each message has a body which is a floating point value between 0.0 and 1.0 sent as a text string. The value 0.0 means that none of the file is loaded yet. 1.0 means that the file is completely loaded. This information is extracted by the Python script "progress.py", which gets all "progress" messages from the message sensor (in case more than one message is received within a single cycle of the game logic). It evaluates the body of the last message, converting it back to a numerical value and assigns the value to the "progress" property of the object.
The camera has some logic attached which causes it to send artificial progress messages for testing the animation. This logic should be deleted from the camera before the file is actually put into use.
Tips:
The purpose of a loading animation is to occupy the viewer's attention while a larger file is loading. It should be as small as possible so that it loads very quickly. Textures, especially *.tga images, increase file size a lot. Use JPEG images or avoid images completely. Save your file using Blender's file compression tool.
Most of the complexity in this example is for showing the download progress of the larger file. Showing the loading progress is very reassuring to the viewer, but not absolutely necessary. You can use any real-time Blender scene as a loading animation.
Embedding Blender 3D Plug-in in web pages
To embed the Blender 3D Plug-in on your web pages, you will need to add some HTML code to your web pages. Also, you will want to add a link to the Blender 3D Plug-in page (http://www.blender3d.com/plugin/) where users can install the plug-in if it is not already installed on their system. Click-able images that you can use to forward users to the download page are available at the Blender 3D Plug-in page.
The current version (2.28) of the Active X control (the Internet Explorer plug-in) is now able to support multiple plug-ins on a one HTML page. The Netscape version does not support this however. Therefore, you are still advised not to put two plug-ins on a HTML page. This will be fixed in one of our forthcoming releases.
Insert the following HTML tag into your web page and change the parameters to suit your content:
<p> <object classid="clsid:5DB05CB8-7751-469D-A1DD-45C8C201C013" id=Blender3DPlugin width = 640 height = 480 codebase="http://www.blender.nl/plugin/Blender3DPlugin.cab#Version=2,25,4,0"> <param name="blenderURL" value="http://www.yoursite.com/yourproduction.blend"> <param name="loadingURL" value="http://www.yoursite.com/yourloadinganimation.blend"> <param name="ForeColor" value=65280> <param name="BackColor" value=255> <param name="useFileBackColor" value=1> <param name="frameRate" value=20> <EMBED type="application/x-blender-plugin" PLUGINSPAGE="http://plugin.blender.nl" name="NPBlender" WIDTH=640 HEIGHT=480 SRC="http://www.yoursite.com/yourproduction.blend" loadingURL="http://www.yoursite.com/yourloadinganimation.blend" ForeColor=65280 BackColor=255 useFileBackColor=1 frameRate=20> </EMBED> </object> </p> |
This code works for both the ActiveX control and the Netscape plug-ins.
The part between the <object> and the <EMBED> tags relates to the ActiveX control.
The classid is the unique identifier of the Blender 3D Plug-in.
The id is the name of the plug-in on the page. This can be used to identify the plug-in in Javascript.
The width and height parameters allow you to set the dimensions of the plug-in on the page. In the example, width and height are given in pixels. You can also specify the dimensions in percentages of the size of the page (e.g. width = "50%").
The codebase is the URL the ActiveX control will be downloaded from when it is not installed on the system the page is viewed on. The version number after the hash sign (#) should read the minimum version of the ActiveX control needed to view your content. Internet Explorer will compare this version to the version of the ActiveX control installed on the system. If the ActiveX control installed is older, the newer version is downloaded and installed automatically.
The <object> tag is followed by a list of parameters:
blenderURL (required) is the URL of the Blender file to be viewed.
loadingURL (optional) is the URL of the custom loading animation.
ForeColor (optional) is the color to be shown while the custom loading animation is downloaded.
BackColor (optional) is the color used to draw the extra areas when the aspect ratio of the plug-in does not match the aspect ratio set in the Blender file.
useFileBackColor (optional) read the color to draw the extra areas with from the Blender file. If neither BackColor or useFileBackColor are set the HTML background color is used to draw the extra areas.
frameRate (optional) is the maximum number of frames per second. When your animation does not need to be viewed at maximum frame rate possible (e.g. web banners), set this value to a meaningful maximum. With lower frame rates the client system will remain more responsive. For other types of content (e.g. games) you probably want to set this value to the maximum of 100 or leave out the parameter in which case the plug-in will use 100 as well.
The Netscape plug-in settings can be found between the <EMBED> and </EMBED> tags. Most of the parameters are the same as those of the ActiveX control.
Parameters that differ are:
PLUGINSPAGE (optional) The URL of the web page displayed by the browser when the plug-in is not installed on the client system.
name (required) The id is the name of the plug-in on the page. This can be used to identify the plug-in in Javascript. It is the equivalent of the id of he Active control.
SRC (required) is the URL of the Blender file to be viewed. The equivalent of the ActiveX blenderURL parameter.
Color values should be passed to the ActiveX control in a format known as OLE_COLOR. The red, green and blue components of the color are stored in a single value. To determine a BGR value, specify blue, green and red (each of which has a value from 0 - 255) in the following formula: BGR value = (blue * 65536) + (green * 256) + red
Some parameters of the plug-ins can be dynamically accessed (through Javascript for example). This means that you can interact with the plug-in from your HTML code. For instance, you can change the URL of the Blender file from the HTML page with a button by adding the following to your HTML page:
                    <form>
<input type="button"
value="load other production"
onClick="Blender3DPlugin.blenderURL='http://www.yoursite.com/other.blend';">
</form>
|
This feature is currently not available for the Netscape plug-ins. We are planning to add Javascript capabilities in the next release.
Another very powerful option is to send messages to the Blender file running inside the plug-in. This way you can change the behaviour of your production from the HTML. The following form allows you to type in messages in the HTML and send them to the plug-in:
<p> <form onSubmit="Blender3DPlugin.SendMessage( the_to.value, the_from.value, the_subject.value, the_body.value); return false;"> <table><tr> <td>to:</td> <td><input type="text" name="the_to" value="" size=30></td></tr> <tr><td>from:</td> <td><input type="text" name="the_from" value="" size=30></td></tr> <tr><td>subject:</td> <td><input type="text" name="the_subject" value="" size=30></td></tr> <tr><td>body:</td> <td><input type="text" name="the_body" value="" size=30></td></tr> <tr><td> </td> <td> <input type="button" value="send" onClick="Blender3DPlugin.SendMessage(the_to.value, the_from.value, the_subject.value, the_body.value);"> </td></tr> </table> </form> </p> |