Ambient Occlusion
Ambient Occlusion is a sophisticated ambient trick which simulates soft global illumination by taking into account the amount of sky, which is assumed the source of light, a given point can see.
This is indeed done by casting rays from each visible point and by counting how many of them actually reach the sky and how many are on the other hand obstructed by objects. The amount of light of the point is then proportional to the number of rays which have 'escaped' and have reached the sky.
This is done by firing a hemisphere of shadow-rays around. If the rays hit another face (it is occluded) then that ray is considered 'shadow' otherwise it is considered 'light'. The ratio between shadow and light rays defines how bright a given pixel is.
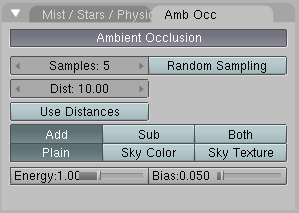
Ambient Occlusion (AO) settings are in the Shading Context, World Buttons Sub-context, in the Amb Occ Tab. AO is off by default, if it is turned on the Tab is populated by many buttons Figure 11.
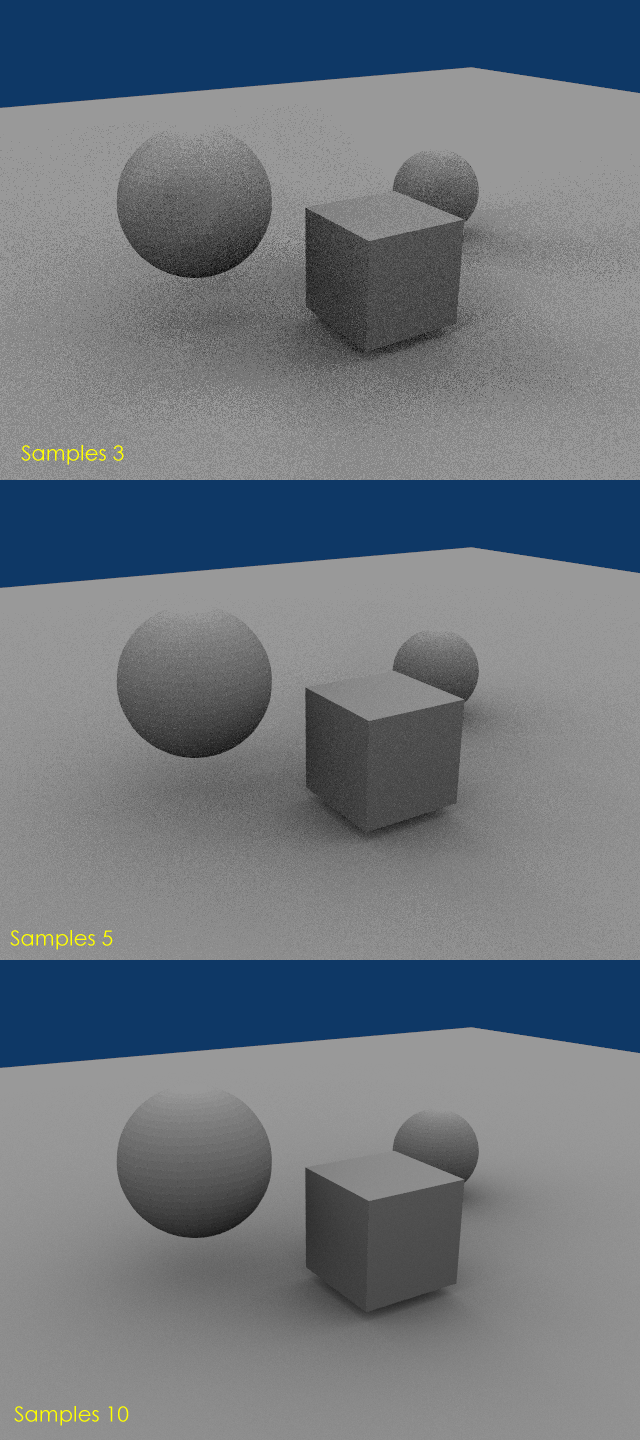
Rays are shooted on the emisphere according to a random pattern, this causes sensible difference in the occlusion pattern of neighbouring pixels unless the number of shooted rays is big enought to produce good statistical data. This is why AO produces a granular pattern, looking like dirt, if rays are not enought. THe number of shooted rays is controlled via the Samples NumButton. The default value of 5 is usually good for previews. The actual amount of shot rays is the square of this number. (i.e. Samples=5 menas 25 rays.) Figure Figure 12. Shows a simple scene, at increasing number of samples. Of course rendering time increases as number of samples increases!
The Dist and Use Distances and DistF Buttons allow for a subtle contol over shadowing by defining a distance dependent behaviour and damping in the occlusion.
The row of radio buttons Add, Sub and Both controls the occlusion behaviour:
Add - The pixel receives light according to the number of non-obstructed rays. The scene is lighter.
Sub - The pixel receives shadow (negative light) according to the number of obstructed rays. The scene is darker.
Both - Both effects take place, the scene have more or less the same lightness.
 | If Sub is chosen then there must be some light source somewhere, otherwise the scene would be pitch black. In the other two cases the scene is lit even if no explicit light is present. |
The row of radio buttons Plain, Sky Color and Sky Texture controls the light color:
Plain - The pixel receives pure white light according to the number of non-obstructed rays.
Sky Color - The pixel receives colored light, the color is computed on the basis of the portion of the sky hitten by the non-obstructed rays (Figure 13)
Sky Texture - A Sky Image texture must be present, possibly an AngMap or a SphereMap. It behaves as Sky Color but the ray color depends on the color of the Sky texture pixel hit.
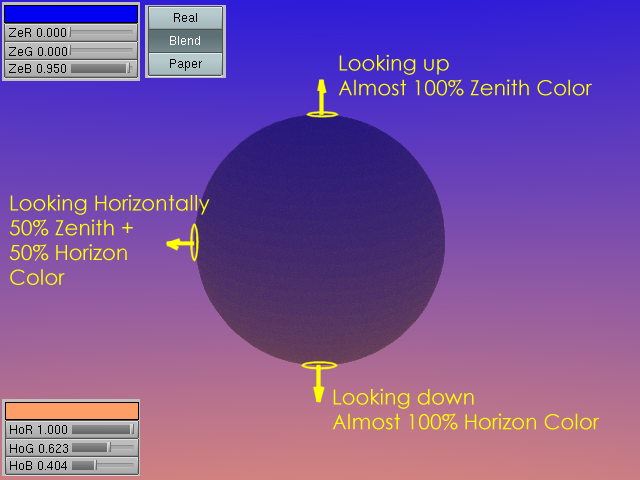
Figure 13. Ambient Occlusion with Sky Color. Zenith is Blue, Horizon is Orange, and type is Blend so that sky goes full orange at Nadir.
The Energy slider controls the actual amout of light/shadows the AO procedure creates.
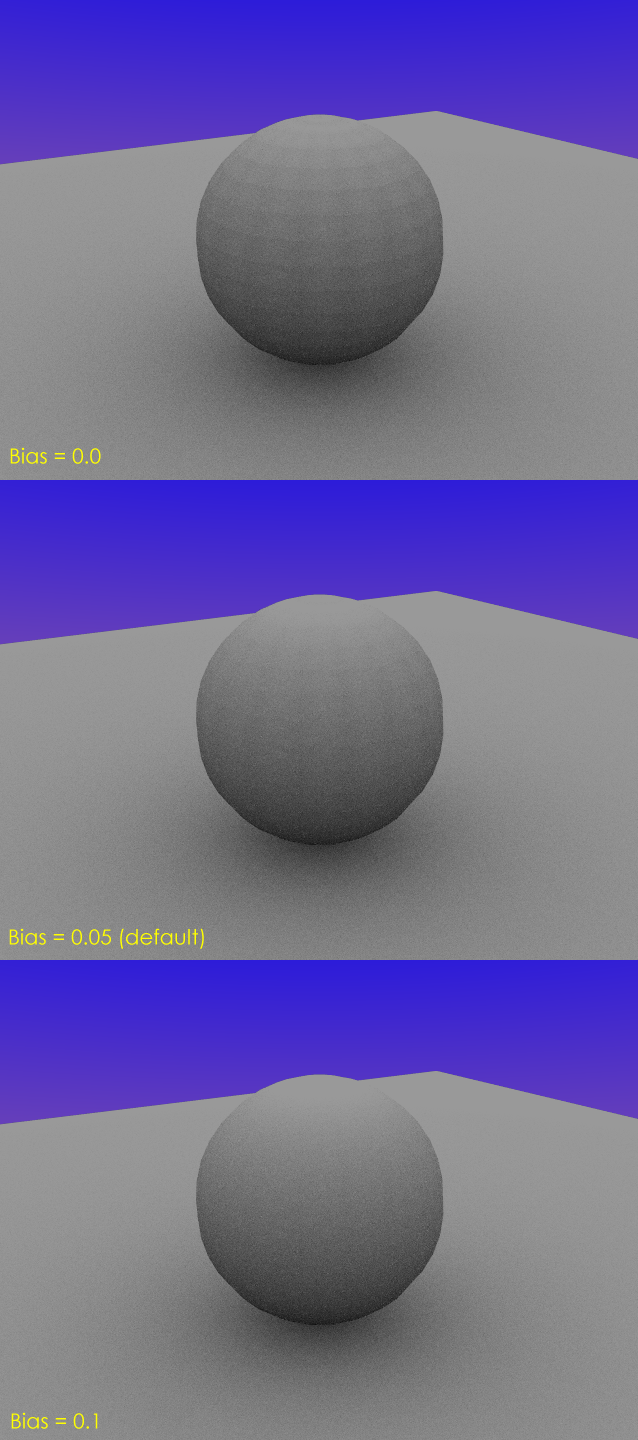
Since AO occurs on the original, faceted, mesh it is possible that the AO light makes faces visible even on objects with smooth on. This is due to the way AO rays are shot and can be controlled with the Bias Slider. The bias setting allows to control how smooth faces will still appear smooth in AO rendering. The bias denotes the angle (in radians) a hemisphere will be made more narrow. Values of 0.05 to 0.1 typically work good. (Figure 14)
Please note thet this is just raytracing, so tends to be slow. Furthermore Performances severely depends from Octree size, see the Rendering Chapter for more info.