Rigging
If we were going for a still picture, this would be enought, but we want Gus to move! Next step is then to give him a skeleton, or Armature, which will move him. This is the fine art of rigging.
Our Gus will have a very simple rigging, four limbs, two arms and two legs, but no joints (elbows or knees) not even feet or hands.
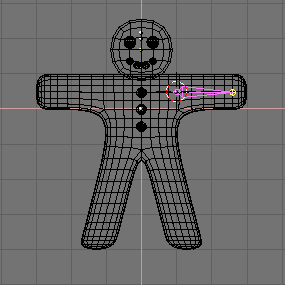
Set the cursor where the shoulder will be, press SPACE>>ADD>>Armature. A romboidal object will appear, stretching from cursor to mouse pointer. This is a bone of the armature system. Place its other end in Gus hand Figure 49 with LMB. The bone will be fixed and a new bone will be created from the end point of the previous, ready to build a bone chain. We don't need other bones right now, so press ESC to undo the new bone.
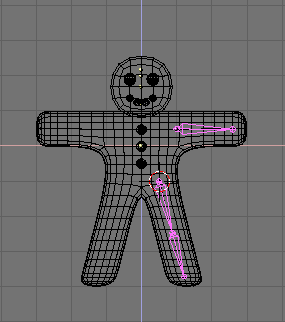
Stay in Edit Mode, move the cursor where the hip joint will be and add a new bone (SPACE>>ADD>>Armature) up to the feet Figure 50.
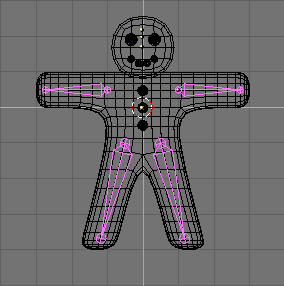
Now place the cursor in the center and select all bones with AKEY, duplicate them with SHIFT D and Flip them as you did for the meshes with XKEY Figure 51.
If you take a look at the Edit Buttons window (Figure 9 in the Section called Build the body) it will be much different now, and, once you selected all the bones (AKEY), will exhibit the Armature buttons Figure 52.

First press the Draw Names button to see the names of the bones, then, by SHIFT LMB on the names in the Edit Button window Figure 52 change them to something appropriate Like Arm.R, Arm.L, Leg.R, Leg.R. Exit from Edit Mode (TAB).
 | Naming Bones |
|---|---|
It is very important to name bones with trailing '.L' or '.R' to distinguish between left and right because the Action editor will be able to automatically 'flip' your poses. |